 Activities
 Elsewhere Online
Links
Elsewhere Online
Links

Half-Square Mania
Half-Square Triangle Quilt
Materials
6 to 8 quarter-yard cuts of multi-color fabrics (or more for variety)
1 yard black (or white) background fabric (avoid directional fabrics)
1 yard fabric for border
1/2 yard fabric for binding (less if same as borders)
batting
fabric for backing
thread for piecing
thread for quilting (if desired)
floss or crochet thread for tying (if desired)
Tools:
Rotary cutter, mat, and 6" x 24" ruler
Sewing machine and basic sewing supplies
Iron and ironing board
Cutting
- Cut one 6" wide strip from selvage to selvage from each of the multi-color fabrics.
- From your collection of strips cut an assortment of twenty-four 6" squares.
- Cut four 6" wide strips from selvage to selvage from the black background fabric.
- Cut twenty-four 6" squares from the black strips.
- Cut five 5" wide strips from selvage to selvage from the border fabric.
- Cut off the selvages.
- Cut five 2.5" wide strips from the binding fabric.
Sewing
- Draw a diagonal line on the back of each multi-color square using a pencil or chalk.
- Place each colored square on a black square with right sides together and pin.
- Sew 1/4" away from the pencil line on both sides—two seams per square.
- Cut along the pencil line using your rotary cutter.
- Using a dry iron (no steam!) press the seams towards the darker fabric very carefully using an up and down motion (don't iron back and forth!).
- Trim each block to 5.5" square
- Lay the blocks out in a configuration that pleases you.
- Sew the blocks in each row together.
- Sew the rows together.
- Press seams to one side (or, if you prefer, you can press seams open.)
- Measure, cut, pin, and sew on the border pieces to the two short sides of the quilt.
- Press seams towards the borders.
- For the two longer borders you'll need to piece the borders.
- Again, measure, cut, pin, and sew on the border pieces to the two long sides of the quilt.
- Press seams towards the borders.
- Layer backing, batting, and pieced top.
- Baste with thread or safety pins if quilting or if simply tie the quilt.
- Trim edges.
- Make binding and apply it to the quilt.
If you open the triangles you'll see you have two blocks that are each half multi-colored and half black.
This is to avoid distorting the fabric since it's on the bias.
You should have 48 squares made up of 2 triangles each.
Other possible layouts and color combinations:
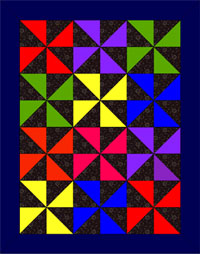
Pinwheels |
Barn Raising |
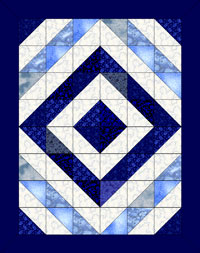
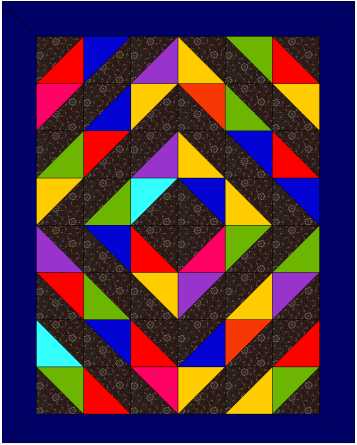
Monochromatic Barn Raising |
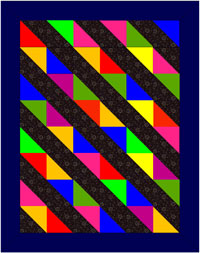
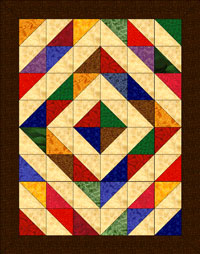
Streak of Lightning |
For more details on finishing the quilt, there are a number of very good books for beginning quilters in our library or you can consult any number of web sites, such as About.com's Quilting pages.